Trying (and failing) to deploy Oxide's control plane
Introduction
I don’t have much experience with low-level or systems programming. I have spent my career writing software that is higher in the stack: javascript running in a web browser, scripting languages, back-end services running on the JVM, or other interpreted languages with a huge layer of abstraction between the code and the hardware. I haven’t had to write code that interfaces directly with the operating system or hardware. There are so many things I want to dig into but there is only so much time in the day - you can’t learn every detail about everything you come across.
I have a massive list of potential project ideas and topics to study. Learning about operating systems, networking, and other system software has been on my list for a while. Although I read (probably too many) tech articles, reading them does not provide the same level of understanding as working on a project yourself. Working on a project gets you thinking much harder about the problem and the wide swath of related problems that are sure to pop up.
To deepen the depth of my understanding and force myself to do more writing, I decided to work on a project with the goal of writing a blog post about it.
The Project Idea
I have been following the Oxide folks for a little while now. They have a podcast where they discuss various things, including deep, technical details of the work being done1. On the podcast, there are plenty of discussions about the details of the computer’s hardware, software, and challenges overcome during its development. In addition to that, they are incredibly transparent with the work they are doing - all the software is open source (available on GitHub) and documentation of key discussions are public.
Their main product is a rack-scale computer and all the software required to start deploying and running software on elastic infrastructure. Users of the system need to be able to provision and use resources at their discretion for many different types of workloads.
These resources include:
- Virtual machines for compute
- Networking to get these machines communicating between each other and the internet
- Block storage to allow virtual machines to store their data
Setting up a virtualised environment might not sound too bad for a single, manually managed machine that gets a lot of love and attention but for elastic cloud infrastructure, this is a huge undertaking. On top of all that, the computer needs to run in environments that might not have access to the internet, this means that remote debugging and software updates are not guaranteed. As someone who has only worked on products that are live services, this is very impressive.
So, the fact that their software is open source and there is lots of public information about how it works, I figured this might be a fantastic way to dive deep with the best odds of success.
The Plan
Since I have listened to a few podcast episodes, I had a high level understanding of a few components of the system:
- Helios - distribution of illumos, as the host operating system
- Propolis - hypervisor
- Omicron - control plane.
Omicron is the control plane and a key piece of the system. The control plane is responsible for many things, including:
- Provisioning resources as requested by users - e.g. spinning up VMs
- Keeping track of these resources so they can be changed and cleaned up as needed e.g. adding more storage
- Providing information about the state of the system to users e.g. system metrics, resources in use.
My initial plan was to:
- Get Omicron running at home
- Be able to provision a VM
- Host my blog on the VM, probably via a cloudflare tunnel because I don’t have a static IP and I don’t want to open up my home network to the internet.
Early on, I considered a stretch goal of getting a language model, like Mistral 7B, running on my (dated) gaming pc and somehow get Omicron to use it for inference. As you will see later, I did not get anywhere close to being able to do this.
I started going through the Omicron repo and reading through the docs. These docs were super helpful as they described:
A diagram describing how the virtual networking is set up was very helpful. I got ChatGPT to explain it to me, though. My networking knowledge is not great.

Source: https://github.com/oxidecomputer/omicron/blob/main/docs/plumbing.png
While planning out the tasks I needed to do, some ideas and questions popped up which I promptly threw into ChatGPT. These were mostly around operating system concepts, computer networking and virtualisation.
A note on AI
I used ChatGPT a lot while working on this project. It was really helpful and it lowered the barrier to entry to allow me to get started and diagnose issues without a huge upfront amount of knowledge and experience. I purchased the pro plan since I was getting pretty decent answers from GPT-5 and started to hit the free limit. ChatGPT lets me jump from topic to topic and learn enough to keep moving, without having to stop what I am doing and learn all the layers of abstraction beneath. This is good but I think learning deeper abstractions is important too. I definitely want to go back and ensure my understanding is correct.
I had gemini open in another tab to ask really straight forward questions - names of cli commands / arguments / vim settings etc. I did this because I kept gemini set to the flash model which was quick and good enough.
I have not used AI to generate any content on my blog (only organic, caffeine fed, human generated content here).
You can find all the relevant chats here. There’s a lot.
Running simulated Omicron locally
After reading the docs on how to run Omicron, I found that you could run it in a simulated way. This allows you to run the control plane, with some parts replaced with a simulated version.
Omicron has:
- A Cockroach DB cluster - used to store details about the state of resources in the system
- ClickHouse DB - used to store metric data
- Nexus - the central hub of the control plane
- An external DNS server - used to expose domain names
- Oximeter - a service that collects metrics from components
- Simulated sled agent - a simulated version of the sled agent.
The Sled Agent
A compute sled is a physical device that contains the CPUs, RAM, storage devices, network devices, among other stuff. These are plugged into the computer and provide it with the hardware that powers all of the virtual resources (as well as the control plane itself).
The sled agent is a program that runs on each sled, responsible for bringing up all the required services. It is a program that is tightly coupled with Helios and does not work on other operating systems.
The fact that the sled agent is coupled to a specific operating system is why a simulated Omicron is useful. We can run Omicron without having to use Helios.
Starting it up
Starting up simulated Omicron was really straightforward thanks to the documentation and the supporting tools/scripts. As summarized from the guide:
- run
source env.shto add the required executables to your shell’s PATH - run
./tools/install_builder_prerequisites.shto download and install all the required dependencies - run
cargo xtask omicron-dev run-allto start up all the services.
That’s it! It is really easy.
RustRover database connection
I am using RustRover to browse and tinker with the Rust code. Like other JetBrain’s IDEs, it has a nice database interface. You can set up some connection details and it will do some inspection and display the database’s schema and provide a nice SQL input screen. I was not able to get this to connect to CockroachDB. I ended up connecting through the cockroachdb cli to explore the database and confirm that it was running. It also took me a little while to figure out that the default password to log into the web console is ‘oxide’.
Running Helios in a VM
Now that I had run Omicron in simulated mode, I wanted to get it running in a non-simulated deployment so I could provision virtual machines. This would require installing Helios on a bare metal machine and then Omicron on top of that. So to start with, I decided to run Helios in a VM so I could tinker around without the extra effort of setting up a real one.
I also considered deploying a different illumos distribution since I figured there would be more documentation and how-to guides. I learned that Helios is based on OmniOS so I could leverage their documentation if needed. Fortunately, there is good documentation and developer tooling for getting Helios.
I asked ChatGPT if there was a guide I could follow and it found the repo containing the Helios Engineering System Tools2. This contained a step by step guide on how to set up a virtual or physical Helios host for development purposes.
The tools support a Linux environment with KVM/QEMU managed by libvirt. I am using Linux Mint so this is the path I took.
Getting the Helios images
Installing lib-virt and setting up the user groups was pretty straight-forward as directed by the docs (although I did have to learn a bit about linux users in the process). My first hurdle was downloading the Helios images.
There is a script to download these images which works great, however when I was downloading the images, they were taking a long time because the wifi connection between my office and the router isn’t great. I have plans to fix this up properly but before then, I need a temporary solution.
Instead of bringing the network to the computer, I brought the computer to the network. I decided to use my Macbook to do the download because I could bring it closer to the router and get several MB/s instead of hundreds of KB/s.
Once the download was complete, I needed a way to transfer data from my Macbook to my linux machine. Since the connection from the linux machine to the router was limited, I decided to use a usb flash drive. I had a few issues with this. The first time I partitioned the drive and the macbook wouldn’t accept it - I had used the DOS partition table. In hindsight, I don’t know if this was the issue but I tried again with GPT. When I used a GPT table and exFAT, the macbook still complained but the disk utility was happy to use it. I used the mac’s disk utility to partition and format the drive. Linux was happy to use that.
No authorized_keys
When figuring out why ./create.sh wasn’t working, I got distracted by the errors being logged instead of reading the last lines of the console.
Earlier in the script, it checks if the libvirt domains and volumes exist. This causes error messages to be logged. These error messages are expected: the script is checking whether the vm already exists and would exit early if these errors did not occur. When looking at the end of the output, I saw:
paz@paz-Z370-HD3:~/Development/helios-engvm$ ./create.sh
...truncated...
+ ./create.sh:119:main: [[ ! -f /home/paz/.ssh/authorized_keys ]]
+ ./create.sh:120:main: echo 'you have no /home/paz/.ssh/authorized_keys file'
you have no /home/paz/.ssh/authorized_keys file
+ ./create.sh:121:main: echo

+ ./create.sh:122:main: echo 'populate /home/paz/Development/helios-engvm/input/cpio/authorized_keys and run again'
populate /home/paz/Development/helios-engvm/input/cpio/authorized_keys and run again
+ ./create.sh:123:main: echo

+ ./create.sh:124:main: exit 1
I populated authorized_keys as directed and this error went away.
libvirt sessions
When running
virsh without root, I had permission issues: it could not open /var/lib/libvirt/images.
This is where I learned that libvirt has the concept of instances: session instances and the system instance. Resources created in one instance are not available in the other. This is why some resources were not showing up when running the virsh list commands (net-list, pool-list, etc.). The create.sh script appears to be written expecting to be using the system instance. Before learning about this, I flailed around trying to run commands as sudo and changing configuration files.
Setting LIBVIRT_DEFAULT_URI to tell libvirt to use the system instance made the script work (after undoing all the things I had tried).
# Check which URI you are using - we want to use the system one
virsh uri

# If you export the following env var, virsh will now use the system instance
export LIBVIRT_DEFAULT_URI=qemu:///system

# If you prefer, use this to set the instance for the current command
virsh -c qemu:///session
I’m in
Once I was connected to the VM, I didn’t know how to disconnect. Ctrl + C was not working. I learned that I was connected to the serial console and that I had to use Ctrl + ] to detach from it. After that I could log in as root without a password. Success!
After that I was presented with a message:
system/illumos/userscript:default failed: transitioned to maintenance
This is when I looked into what the userscript service is. The service appears to run a script on boot that is located here
/var/metadata/userscript.
A little bit of investigation showed that the first time it ran, it created a rpool and then failed when trying to access .ssh/authorized_keys. After that, every time it ran, it failed when creating the rpool because it already existed.
I decided to manually fix the virtual machine but manually adding my key to authorized_keys and running the commands from the script. I copied my key in by copying my public key to the clipboard and then pasting it into vim while connected through the serial console.
Running Helios on bare metal
Now that I had run Omicron in simulated mode and Helios in a VM, I wanted to get Omicron running bare-metal with Helios so that I could provision virtual machines. Omicron cannot provision VMs while in a VM because the hypervisor does not support nested virtualisation.
I originally planned to use an old raspberry pi that was lying around to host Omicron, but after some research (and ChatGPT consultations), I decided to deploy it on a mini pc. A few reasons:
- Raspberry Pis are ARM and that is not an officially supported platform. Although, there seems to be work on it
- It only has 1GB of RAM
These made using the raspberry pi a deal breaker.
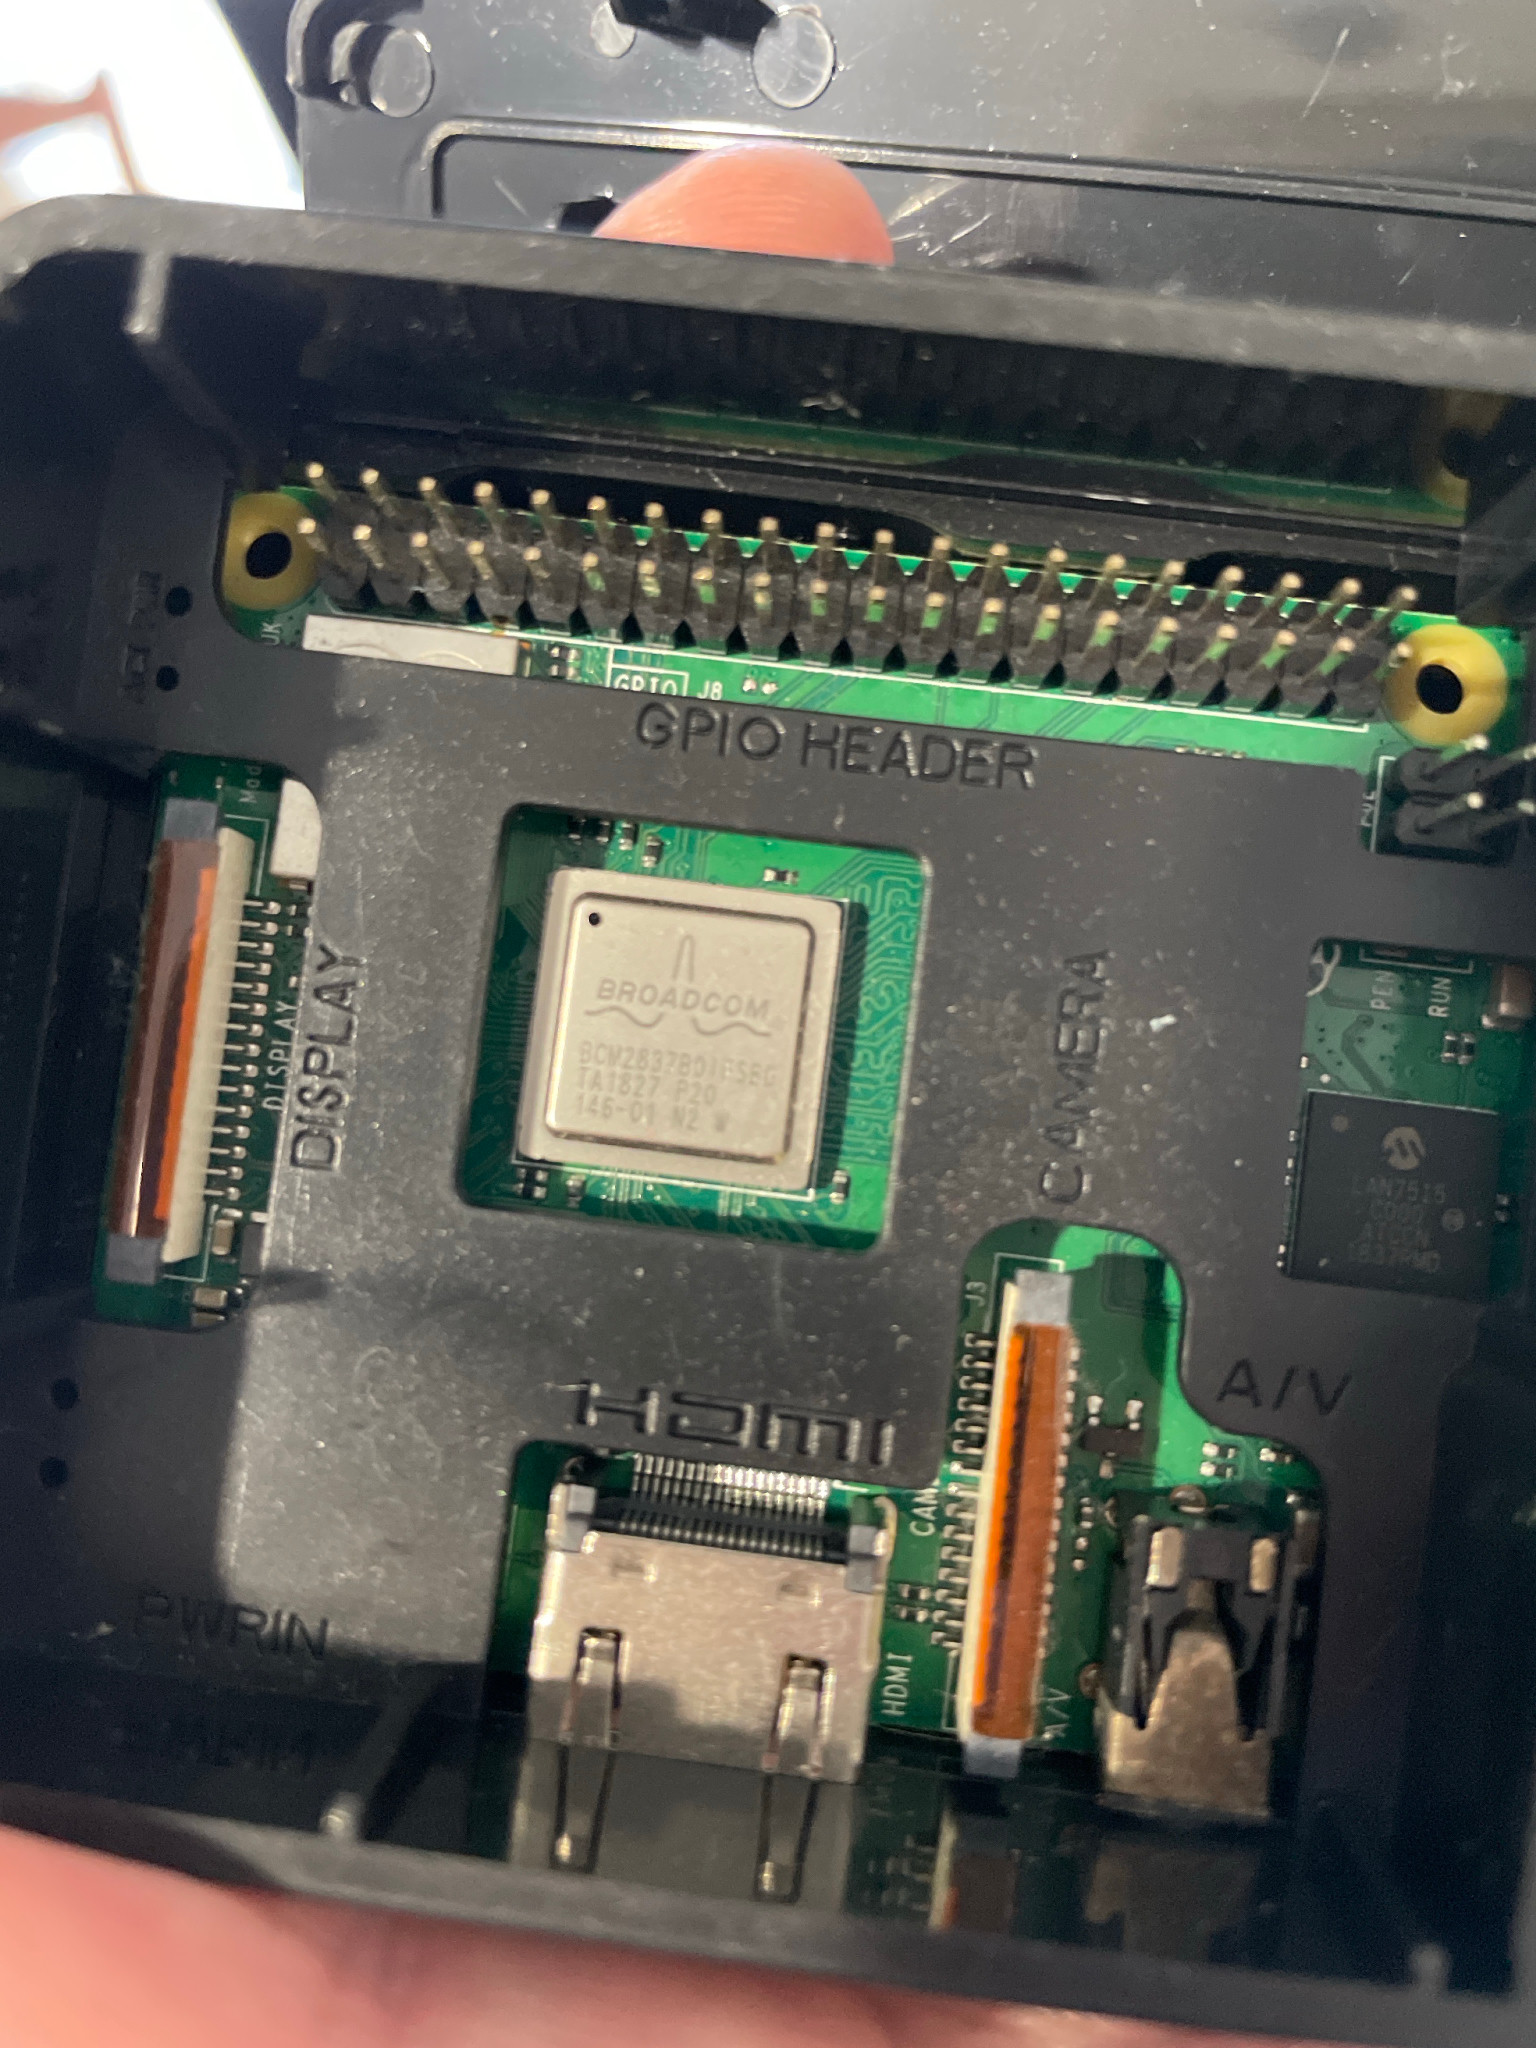
My raspberry pi (The image I showed to ChatGPT)
I considered using my home computer but I decided to use a mini pc instead because:
- I didn’t want to mess with my hard drive and potentially stuff up the partitioning and lose data
- If I wanted to use a new SSD, I would have to spend a similar amount of money anyway
- If I had another computer, I could keep it running as a homelab server
I decided to go ahead a buy a mini pc - a pretty cheap one off of Amazon called Mini PC N150 W11 PRO, Mini Desktop Computer with LPDDR5 12GB RAM 512GB M.2 2242 SSD, Mini Computer 4K Triple Display/Dual 2.5G LAN/WiFi5/BT5 for Office/Business3.
Networking
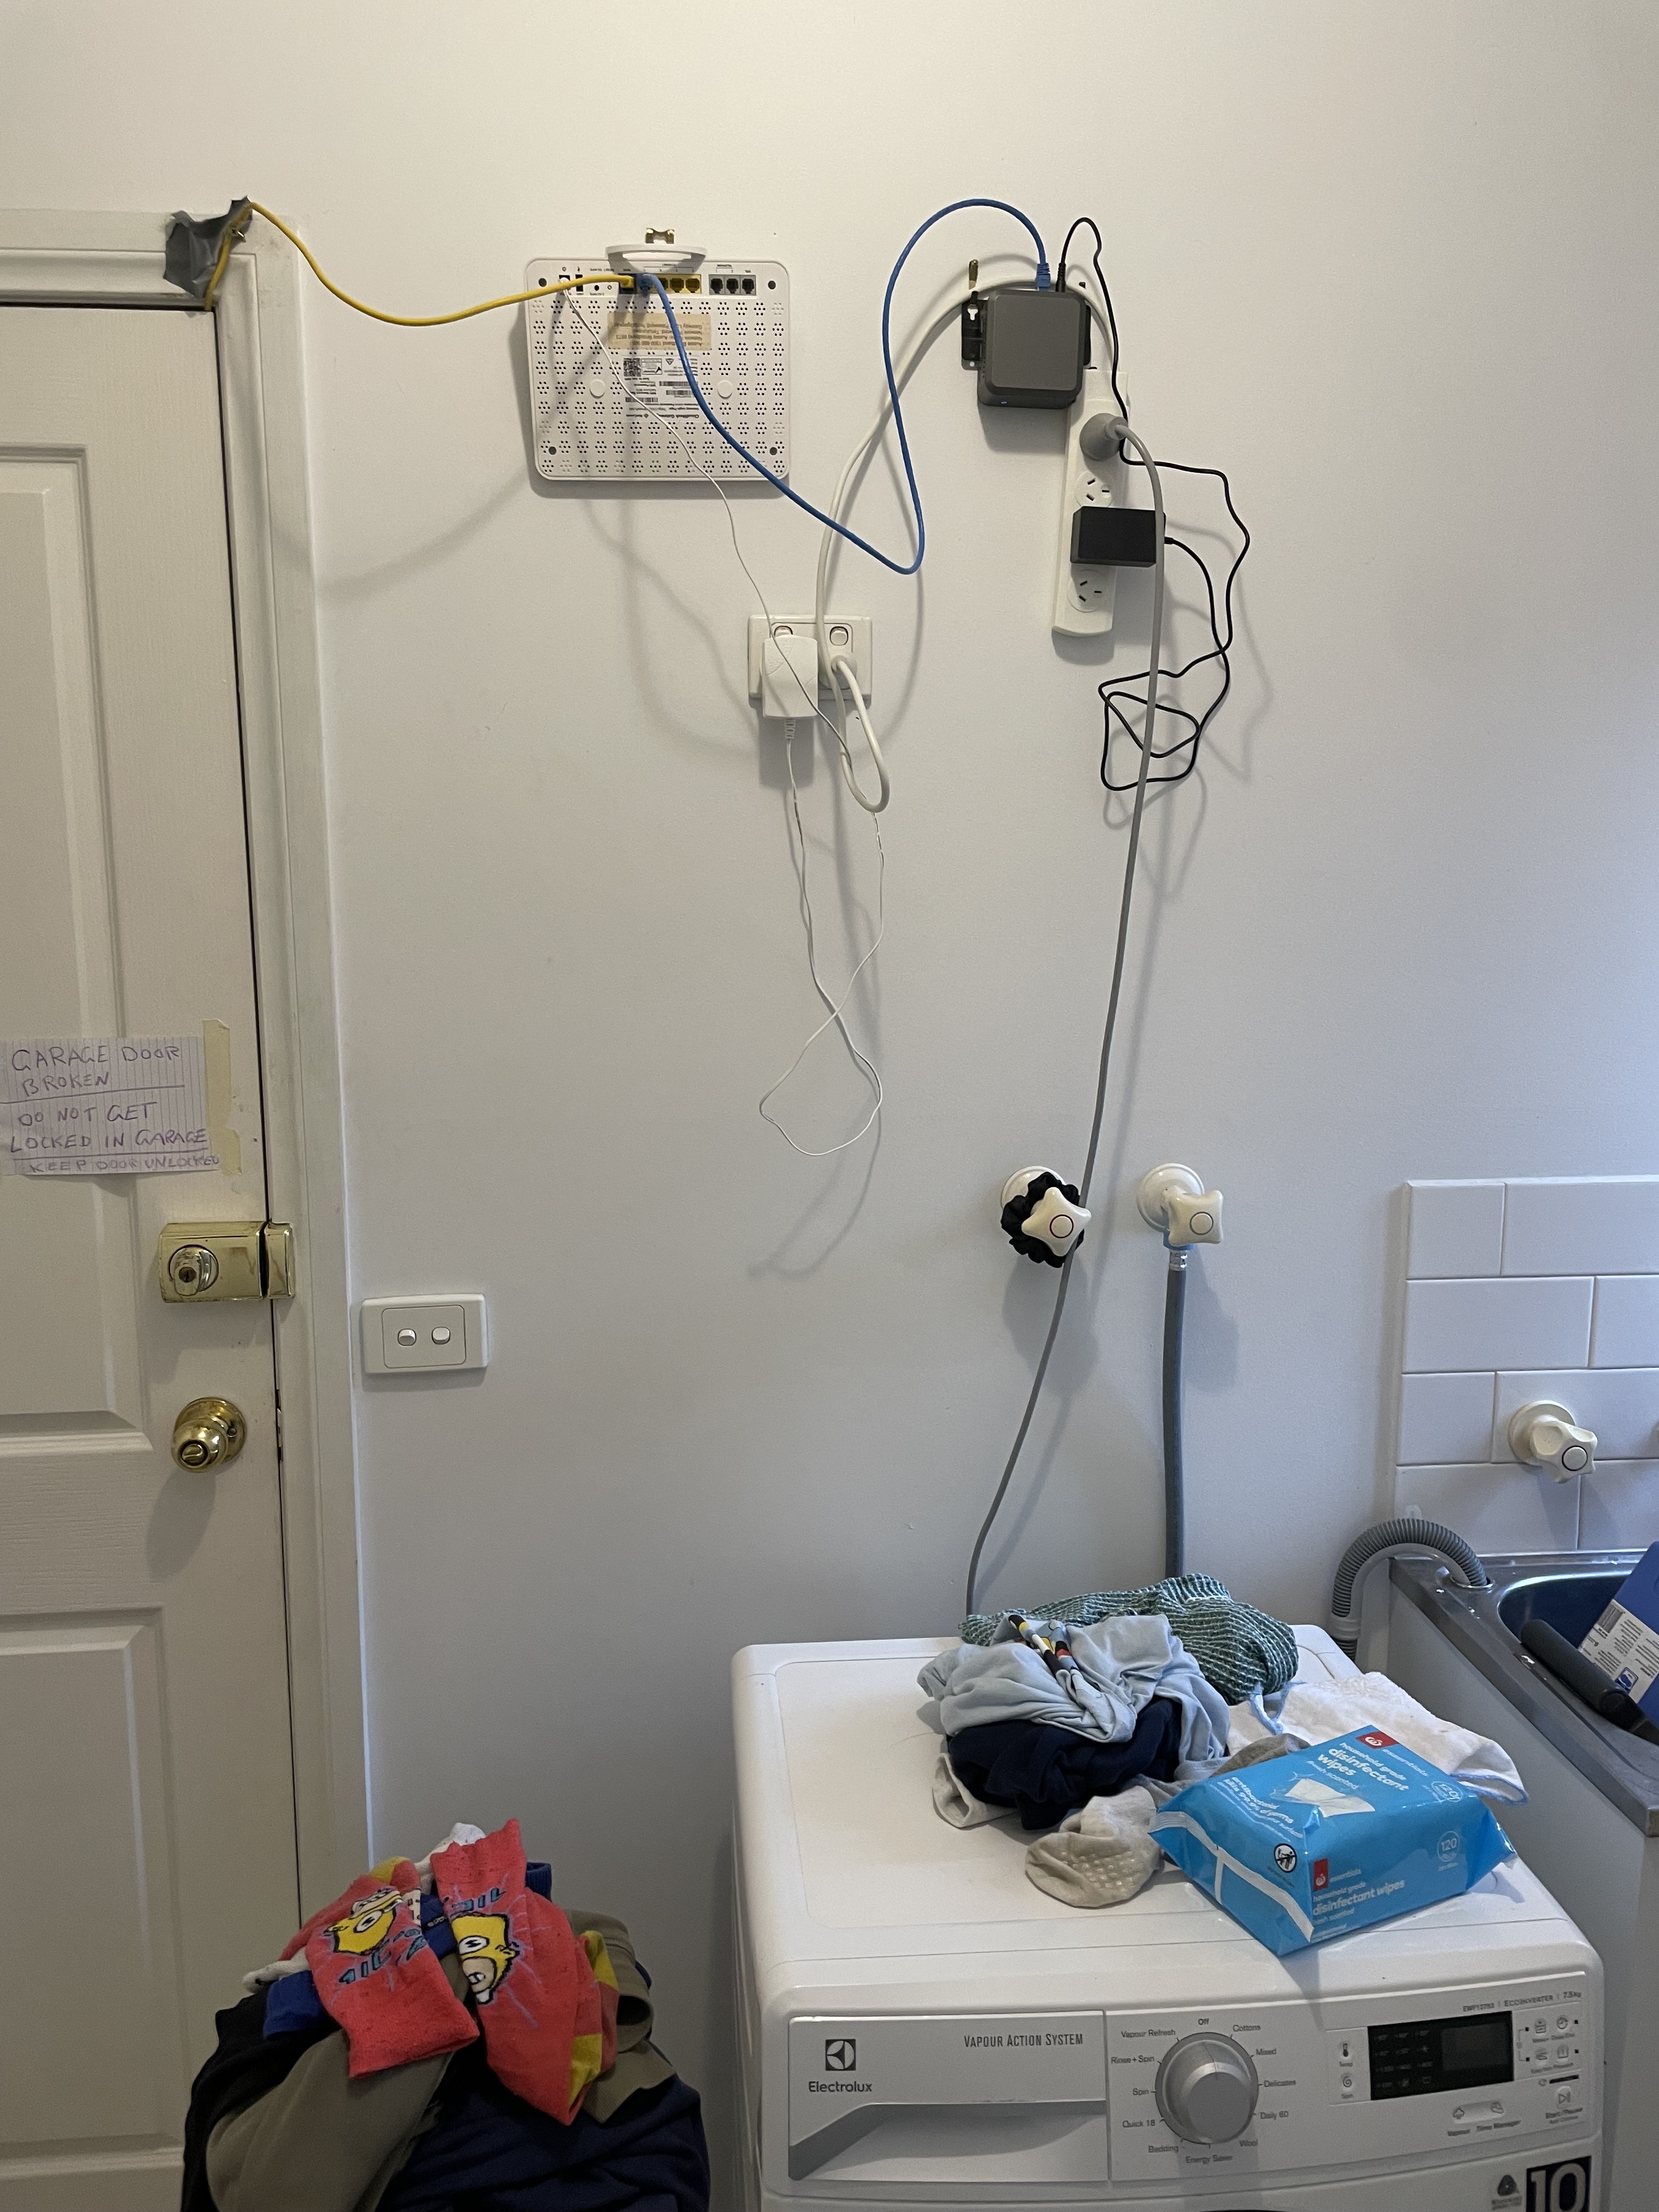
I originally wanted to set up a router/switch I have had sitting in a cupboard for years and use that to connect my mini-pc and linux pc to the network.

This bad boy has been in a cupboard for like 7 years
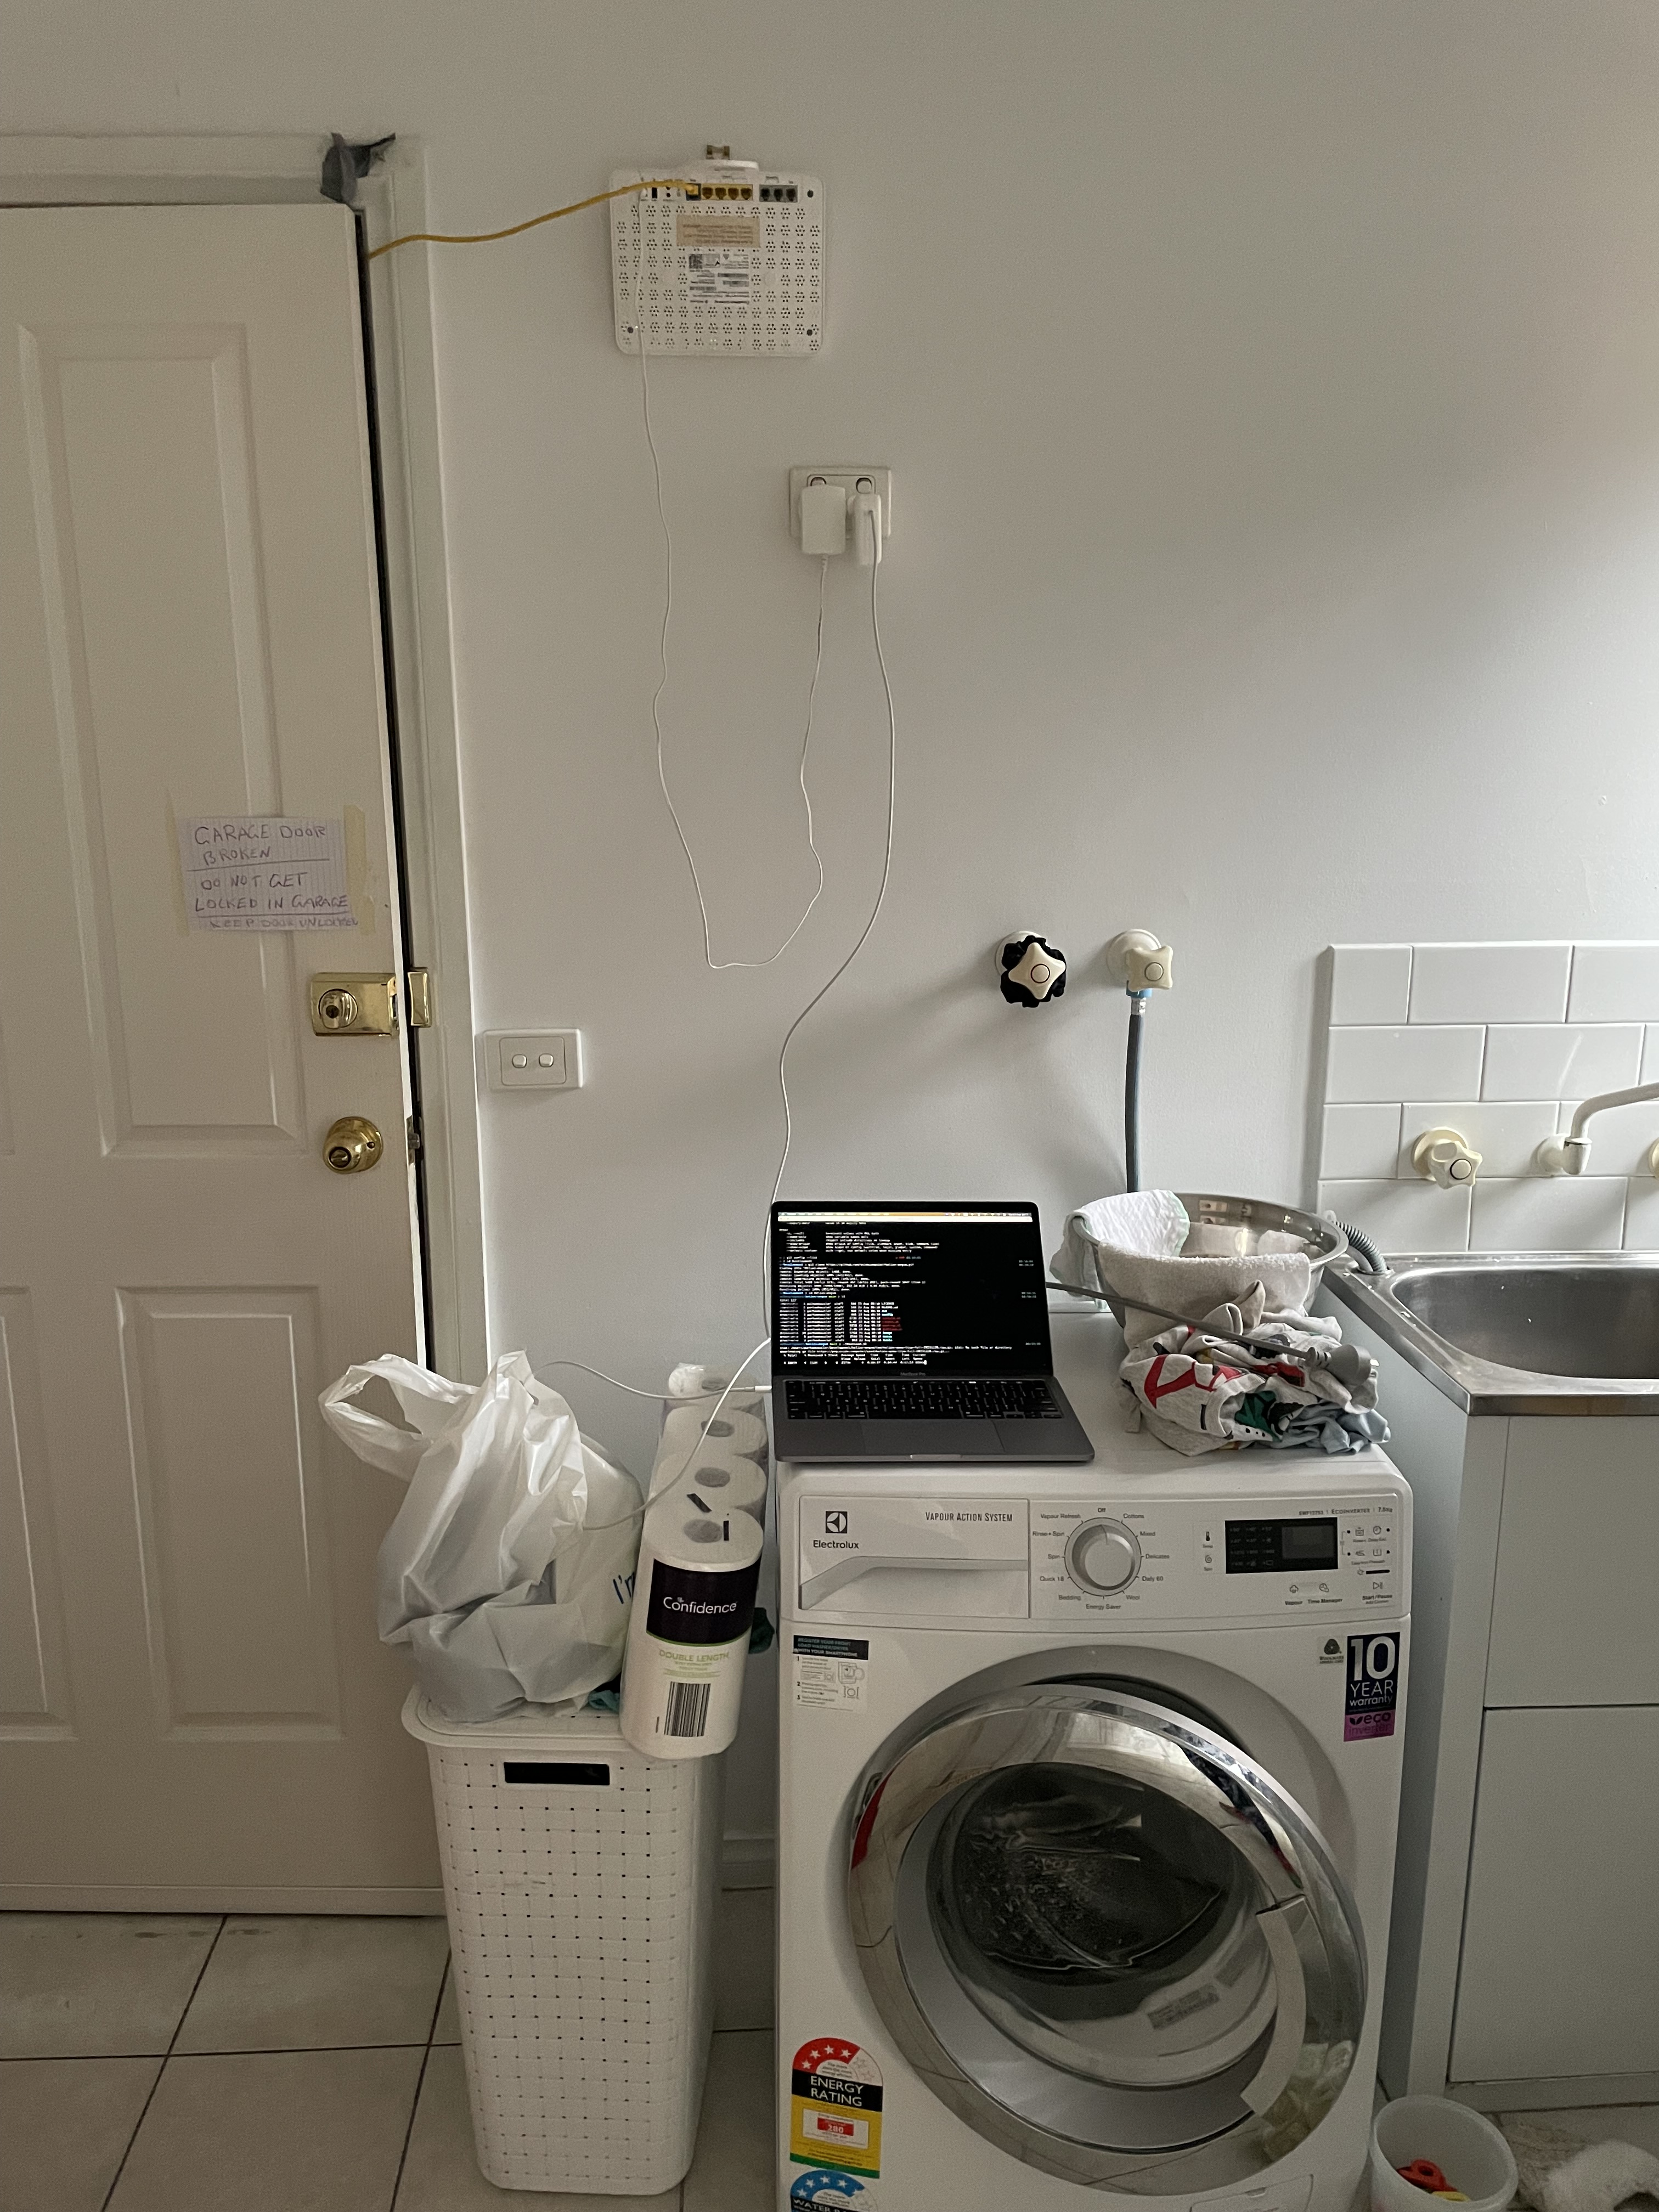
I tried, with the help of ChatGPT, to get this running as a bridge with my home router via wifi but I couldn’t get it running in the hour or two that I tried. Eventually, I’ll connect this to my home router with a wired connection but the router is far away and I don’t want a long cable going between rooms. I ended up plugging the mini pc straight into my home router. This is so that I could ssh into it from my linux machine in the other room. When setting the machine up initially, I had a monitor, mouse, and keyboard plugged into it, sitting on top of the washing machine4.
I need to do the laundry more frequently
Installing Helios
The guide to install Helios in a VM also includes instructions on how to install it on a physical machine. I continued to follow the guide.
I used dd when setting up the boot drive as directed. It was slow without specifying the block size. Adding the bs=4M argument improved the copy speed from 200kb/s to 100MB/s.
When running the install-helios command, the tar command errored out with directory checksum error. I tried to figure out what could be causing it by using verbose mode. It printed out each file as it processed them but didn’t clearly state whether the last file printed was the one causing the error or not. I had a quick attempt at trying to determine which file could be causing the error by looking at the pattern of files processed and extrapolating what the next file could be. That approach was not successful.
I did some exploration on the VM but decided to go to the real machine because I don’t understand all the layers of abstraction - which parts of the system behave differently in a VM compared to the physical machine? If I use the VM, I can’t be sure it behaves the same as on the real machine.
I decided to try the easy option before diving deep and trying to identify the root cause. I reformatted the boot drive and followed the instructions again. For some reason it worked this time. I am not sure if the problem was the boot drive or something else.
I continued following the guide to set up the machine: configured networking, user accounts, swap space, dump device, system updates, and dev tools (including Rust).
Now Helios is installed on the mini pc and I can ssh into it from my linux machine.
The First Attempt at Running Omicron
I followed the guide here. It is possible to build Omicron on a machine that is different from the one you will run it on. Out of simplicity, I decided to do it all on the mini pc. I cloned the omicron repo on the mini pc and continued following the instructions.
After installing the prerequisites (with ./tools/install_prerequisites.sh), there are four main tasks to be done:
- Create virtual hardware so the system looks like a real sled
- Update configuration files so the sled agent knows how to talk to the network (and what ip ranges to use)
- Build Omicron - compile the code and choose which components to be installed
- Install Omicron - set up the components on the system and start things up
Building Omicron on the mini pc took a little while.
I'm not sure if building for release was worth it - time for a coffee break!
After following the guide and running the install command, the sled agent started up and tried to bring up the rest of the services. Things seemed to be going well until the the log file stopped being updated. When I tried to inspect what was happening, I couldn’t run any commands - I seemed to have lost connection to the mini pc. Attempting to reconnect via ssh did not work. Well, some of the last messages I saw mentioned external DNS, maybe there’s a networking problem.
I tried using dig but couldn’t find anything. I don’t really know how to use dig.
dig recovery.sys.oxide.test @192.168.1.20 +short
After searching around for answers and finding none, out of frustration I tried to connect again. It worked. Strange, I didn’t do anything, why is it working now?
I thought about debugging it straight away but I just wanted to get it started so I ran the install command again. While looking at the sled agent’s logs, I saw that it tried and failed to start a few times before being put into maintenance mode by the service manager. The network devices disappeared. The system had crashed.
Resist and Persist
I am not sure why the system crashed so I asked ChatGPT. It gave me some things to try:
# Decompress the crash dump
savecore -vf /var/crash/helios-mini-pc/vmdump.0

# Read panic info
cd /var/crash/helios-mini-pc
mdb -k unix.N vmcore.N

# Inside mdb
::status
::panicinfo
::stack
$q

# See FMA record for reboot
fmdump -Vp -u e3dda2c0-0ef0-4f2a-834c-cb84c54744f8
These are some good things to try but it will take a long time to figure out how to use all these tools, let alone the root cause. I decided to start up Omicron again to see if it reliably causes a crash.
Before I try and start Omicron up again, I need to recreate the virtual network devices.
I decided to see if I could make the virtual devices persistent so I wouldn’t have to recreate them if the system crashed again. I explored the code on my linux machine with RustRover, then I used ssh to change and run the code on the mini pc.
I have a tiny amount of Rust experience, and it has been awhile since I had used it. I had the common beginner experience of bumping into the borrow checker and then proceeding to try and clone everything. I made some modifications to the tool so it would print out the commands it was running along with its arguments, stdout, and stderr.
I briefly had trouble trying to compile the code on my linux machine before making the changes on the mini pc. The compiler skipped some code because of the annotation: #[cfg(target_os = "illumos")] because I was on linux.
I managed to add a flag to the command so it would make the vnics and simnets persistent.
When running command now, it started failing. It failed when trying to run
dladm set-linkprop -p mtu=9000 <simnet_name>
This was working for non-persistent simnets but it logs an error when trying to run on persistent simnets.
In hindsight, this might not have been a problem because as you will see, some commands will log an error but appear to have worked. Also, I might have been able to get away with not setting the mtu property.
I decided to give up on making the simnets and vnics persistent and just recreate them as they were before.
Confusing error messages
I came across a few bits of confusing behaviour (as a new user of illumos). Improvements to the following problems could be good tasks for someone to start contributing to illumos5.
There are dladm commands for managing simnets: create, modify, delete etc. The man page and --help output do not mention these commands at all. I found a illumos PR that intends to add this but it has not been merged.
While testing, I needed to delete and recreate simnets.
dladm delete-simnet says deletion failed: object not found but it seems to have worked because it disappears from the list.
paz@helios-mini-pc:~/Development/omicron$ dladm
LINK        CLASS     MTU    STATE    BRIDGE     OVER
igc1        phys      1500   up       --         --
igc0        phys      1500   unknown  --         --
net0        simnet    9000   up       --         sc0_0
sc0_0       simnet    9000   up       --         net0
net1        simnet    9000   up       --         sc1_0
sc1_0       simnet    9000   up       --         net1
sc0_1       vnic      1500   up       --         igc1
tfportrear0_0 simnet  9000   up       --         sidecar_shi0
sidecar_shi0 simnet   9000   up       --         tfportrear0_0
tfportqsfp0_0 simnet  9000   up       --         sidecar_shi1
sidecar_shi1 simnet   9000   up       --         tfportqsfp0_0
paz@helios-mini-pc:~/Development/omicron$ dladm delete-simnet sidecar_shi0
dladm: simnet deletion failed: permission denied
paz@helios-mini-pc:~/Development/omicron$ pfexec dladm delete-simnet sidecar_shi0
dladm: simnet deletion failed: object not found
paz@helios-mini-pc:~/Development/omicron$ dladm
LINK        CLASS     MTU    STATE    BRIDGE     OVER
igc1        phys      1500   up       --         --
igc0        phys      1500   unknown  --         --
net0        simnet    9000   up       --         sc0_0
sc0_0       simnet    9000   up       --         net0
net1        simnet    9000   up       --         sc1_0
sc1_0       simnet    9000   up       --         net1
sc0_1       vnic      1500   up       --         igc1
tfportrear0_0 simnet  9000   up       --         --
tfportqsfp0_0 simnet  9000   up       --         sidecar_shi1
sidecar_shi1 simnet   9000   up       --         tfportqsfp0_0
paz@helios-mini-pc:~/Development/omicron$ pfexec dladm delete-simnet sidecar_shi1
dladm: simnet deletion failed: object not found
paz@helios-mini-pc:~/Development/omicron$ dladm
LINK        CLASS     MTU    STATE    BRIDGE     OVER
igc1        phys      1500   up       --         --
igc0        phys      1500   unknown  --         --
net0        simnet    9000   up       --         sc0_0
sc0_0       simnet    9000   up       --         net0
net1        simnet    9000   up       --         sc1_0
sc1_0       simnet    9000   up       --         net1
sc0_1       vnic      1500   up       --         igc1
tfportrear0_0 simnet  9000   up       --         --
tfportqsfp0_0 simnet  9000   up       --         --
paz@helios-mini-pc:~/Development/omicron$
Sometimes dladm outputs very terse error messages without much detail
# When running npuzone (part of virtual-hardware create)
paz@helios-mini-pc:~/Development/omicron$ /usr/bin/pfexec  /home/paz/Development/omicron/out/npuzone/npuzone create sidecar --omicron-zone --ports sc0_0,tfportrear0_0 --ports sc0_1,tfportqsfp0_0 --sidecar-lite-commit 9499681efa8cdbffe807e6b40bf9211d0d2c21aa --softnpu-commit 3203c51cf4473d30991b522062ac0df2e045c2f2
remote url: https://buildomat.eng.oxide.computer/public/file/oxidecomputer/softnpu/image/3203c51cf4473d30991b522062ac0df2e045c2f2/softnpu.sha256.txt
already have latest softnpu
remote url: https://buildomat.eng.oxide.computer/public/file/oxidecomputer/sidecar-lite/release/9499681efa8cdbffe807e6b40bf9211d0d2c21aa/libsidecar_lite.so.sha256.txt
already have latest asic_program.so
remote url: https://buildomat.eng.oxide.computer/public/file/oxidecomputer/sidecar-lite/release/9499681efa8cdbffe807e6b40bf9211d0d2c21aa/scadm.sha256.txt
already have latest scadm
creating port tfportrear0_0 for sc0_0
ztest
paz@helios-mini-pc:~/Development/omicron$ /usr/bin/pfexec  /home/paz/Development/omicron/out/npuzone/npuzone create sidecar --omicron-zone --ports sc0_0,tfportrear0_0 --ports sc0_1,tfportqsfp0_0 --sidecar-lite-commit 9499681efa8cdbffe807e6b40bf9211d0d2c21aa --softnpu-commit 3203c51cf4473d30991b522062ac0df2e045c2f2
remote url: https://buildomat.eng.oxide.computer/public/file/oxidecomputer/softnpu/image/3203c51cf4473d30991b522062ac0df2e045c2f2/softnpu.sha256.txt
already have latest softnpu
remote url: https://buildomat.eng.oxide.computer/public/file/oxidecomputer/sidecar-lite/release/9499681efa8cdbffe807e6b40bf9211d0d2c21aa/libsidecar_lite.so.sha256.txt
already have latest asic_program.so
remote url: https://buildomat.eng.oxide.computer/public/file/oxidecomputer/sidecar-lite/release/9499681efa8cdbffe807e6b40bf9211d0d2c21aa/scadm.sha256.txt
already have latest scadm
creating port tfportrear0_0 for sc0_0
Error: dlmgmtd: link id creation failed: 17
I had to hunt around to determine what 17 means:
- Looked in npuzone found
SimnetLink::new() - went to ztest (in falcon repo), found create_simnet_link
- went to libnet (in netadm-sys repo), found call to rusty_doors with data that looks like a sys call thing
- Went to illumos/illumos-gate: grepped around and found: https://github.com/illumos/illumos-gate/blob/master/usr/src/cmd/dlmgmtd/dlmgmt_util.c#L528C9-L528C15
- Went to https://github.com/illumos/illumos-gate/blob/master/usr/src/boot/sys/sys/errno.h#L68 And EEXIST = 17.
So it’s erroring out because it already exists. It worked after I manually deleted the tfport* links.
paz@helios-mini-pc:~/Development/omicron$ /usr/bin/pfexec  /home/paz/Development/omicron/out/npuzone/npuzone create sidecar --omicron-zone --ports sc0_0,tfportrear0_0 --ports sc0_1,tfportqsfp0_0 --sidecar-lite-commit 9499681efa8cdbffe807e6b40bf9211d0d2c21aa --softnpu-commit 3203c51cf4473d30991b522062ac0df2e045c2f2
remote url: https://buildomat.eng.oxide.computer/public/file/oxidecomputer/softnpu/image/3203c51cf4473d30991b522062ac0df2e045c2f2/softnpu.sha256.txt
already have latest softnpu
remote url: https://buildomat.eng.oxide.computer/public/file/oxidecomputer/sidecar-lite/release/9499681efa8cdbffe807e6b40bf9211d0d2c21aa/libsidecar_lite.so.sha256.txt
already have latest asic_program.so
remote url: https://buildomat.eng.oxide.computer/public/file/oxidecomputer/sidecar-lite/release/9499681efa8cdbffe807e6b40bf9211d0d2c21aa/scadm.sha256.txt
already have latest scadm
creating port tfportrear0_0 for sc0_0
Error: dlmgmtd: link id creation failed: 17
paz@helios-mini-pc:~/Development/omicron$ pfexec dladm delete-simnet si^C
paz@helios-mini-pc:~/Development/omicron$ pfexec dladm delete-simnet tfportrear0_0
paz@helios-mini-pc:~/Development/omicron$ pfexec dladm delete-simnet tfportqsfp0_0
paz@helios-mini-pc:~/Development/omicron$ /usr/bin/pfexec  /home/paz/Development/omicron/out/npuzone/npuzone create sidecar --omicron-zone --ports sc0_0,tfportrear0_0 --ports sc0_1,tfportqsfp0_0 --sidecar-lite-commit 9499681efa8cdbffe807e6b40bf9211d0d2c21aa --softnpu-commit 3203c51cf4473d30991b522062ac0df2e045c2f2
remote url: https://buildomat.eng.oxide.computer/public/file/oxidecomputer/softnpu/image/3203c51cf4473d30991b522062ac0df2e045c2f2/softnpu.sha256.txt
already have latest softnpu
remote url: https://buildomat.eng.oxide.computer/public/file/oxidecomputer/sidecar-lite/release/9499681efa8cdbffe807e6b40bf9211d0d2c21aa/libsidecar_lite.so.sha256.txt
already have latest asic_program.so
remote url: https://buildomat.eng.oxide.computer/public/file/oxidecomputer/sidecar-lite/release/9499681efa8cdbffe807e6b40bf9211d0d2c21aa/scadm.sha256.txt
already have latest scadm
creating port tfportrear0_0 for sc0_0
creating port tfportqsfp0_0 for sc0_1
softnpu zone setup
configure zone
install zone
boot zone
[sidecar_softnpu] svcs milestone/network
STATE          STIME    FMRI
online          7:33:40 svc:/milestone/network:default
[sidecar_softnpu] /softnpu/npu start

paz@helios-mini-pc:~/Development/omicron$
One thing I couldn’t figure out: npuzone seemed to consistently fail on the first run and then succeed the second time. I didn’t bother to debug this one, I wanted to keep going.
Another thing I came across but didn’t bother digging into:
# Error is shown but net0 device exists and the command continues processing
/usr/sbin/dladm show-simnet -p -o LINK net0
dladm: link net0 is not valid: object not found
Preparing for another run
I spent some time trying to inspect the crash dump but didn’t end up with anything conclusive. I’d love to spend more time digging into this but I had to keep moving because this project was already taking much longer than I intended it to.
Here are some things I learned while digging around:
The kernel panicked while stuck pushing a page while the system had very low memory.
pageout_deadman: stuck pushing the same page for 90 seconds (freemem is 3381)
It seems like a lot of threads were waiting
THREAD STATE SOBJ COUNT
fffffe0016811c20 SLEEP CV 3069
swtch+0x139
cv_wait+0x70
taskq_thread_wait+0xbe
taskq_thread+0x344
thread_start+0xb
I don’t really know what’s happening, it seems the kernel is having trouble writing pages to disk. Maybe because the disk is slow? This is a cheap mini pc after all. Maybe because the drivers are bad?
I considered that the drivers could be contributing to the crash. When I bought the mini pc, there was an amazon review that mentioned the default drivers are bad. I am not sure what operating system they were using but this gave me the idea that the drivers could be a problem. Looking into the drivers could be a potential future project.
I wanted to start up Omicron again but I wanted to be ready just in case it crashes again:
- I played around with iostat and vmstat to try and to see if there’s too much load on the disk
- I considered changing system dumps to do a full dump instead of only kernel pages but opted not to due to the size
- I considered increasing the swap space but it didn’t appear to be full at the time of the crash
Reinstalling Omicron
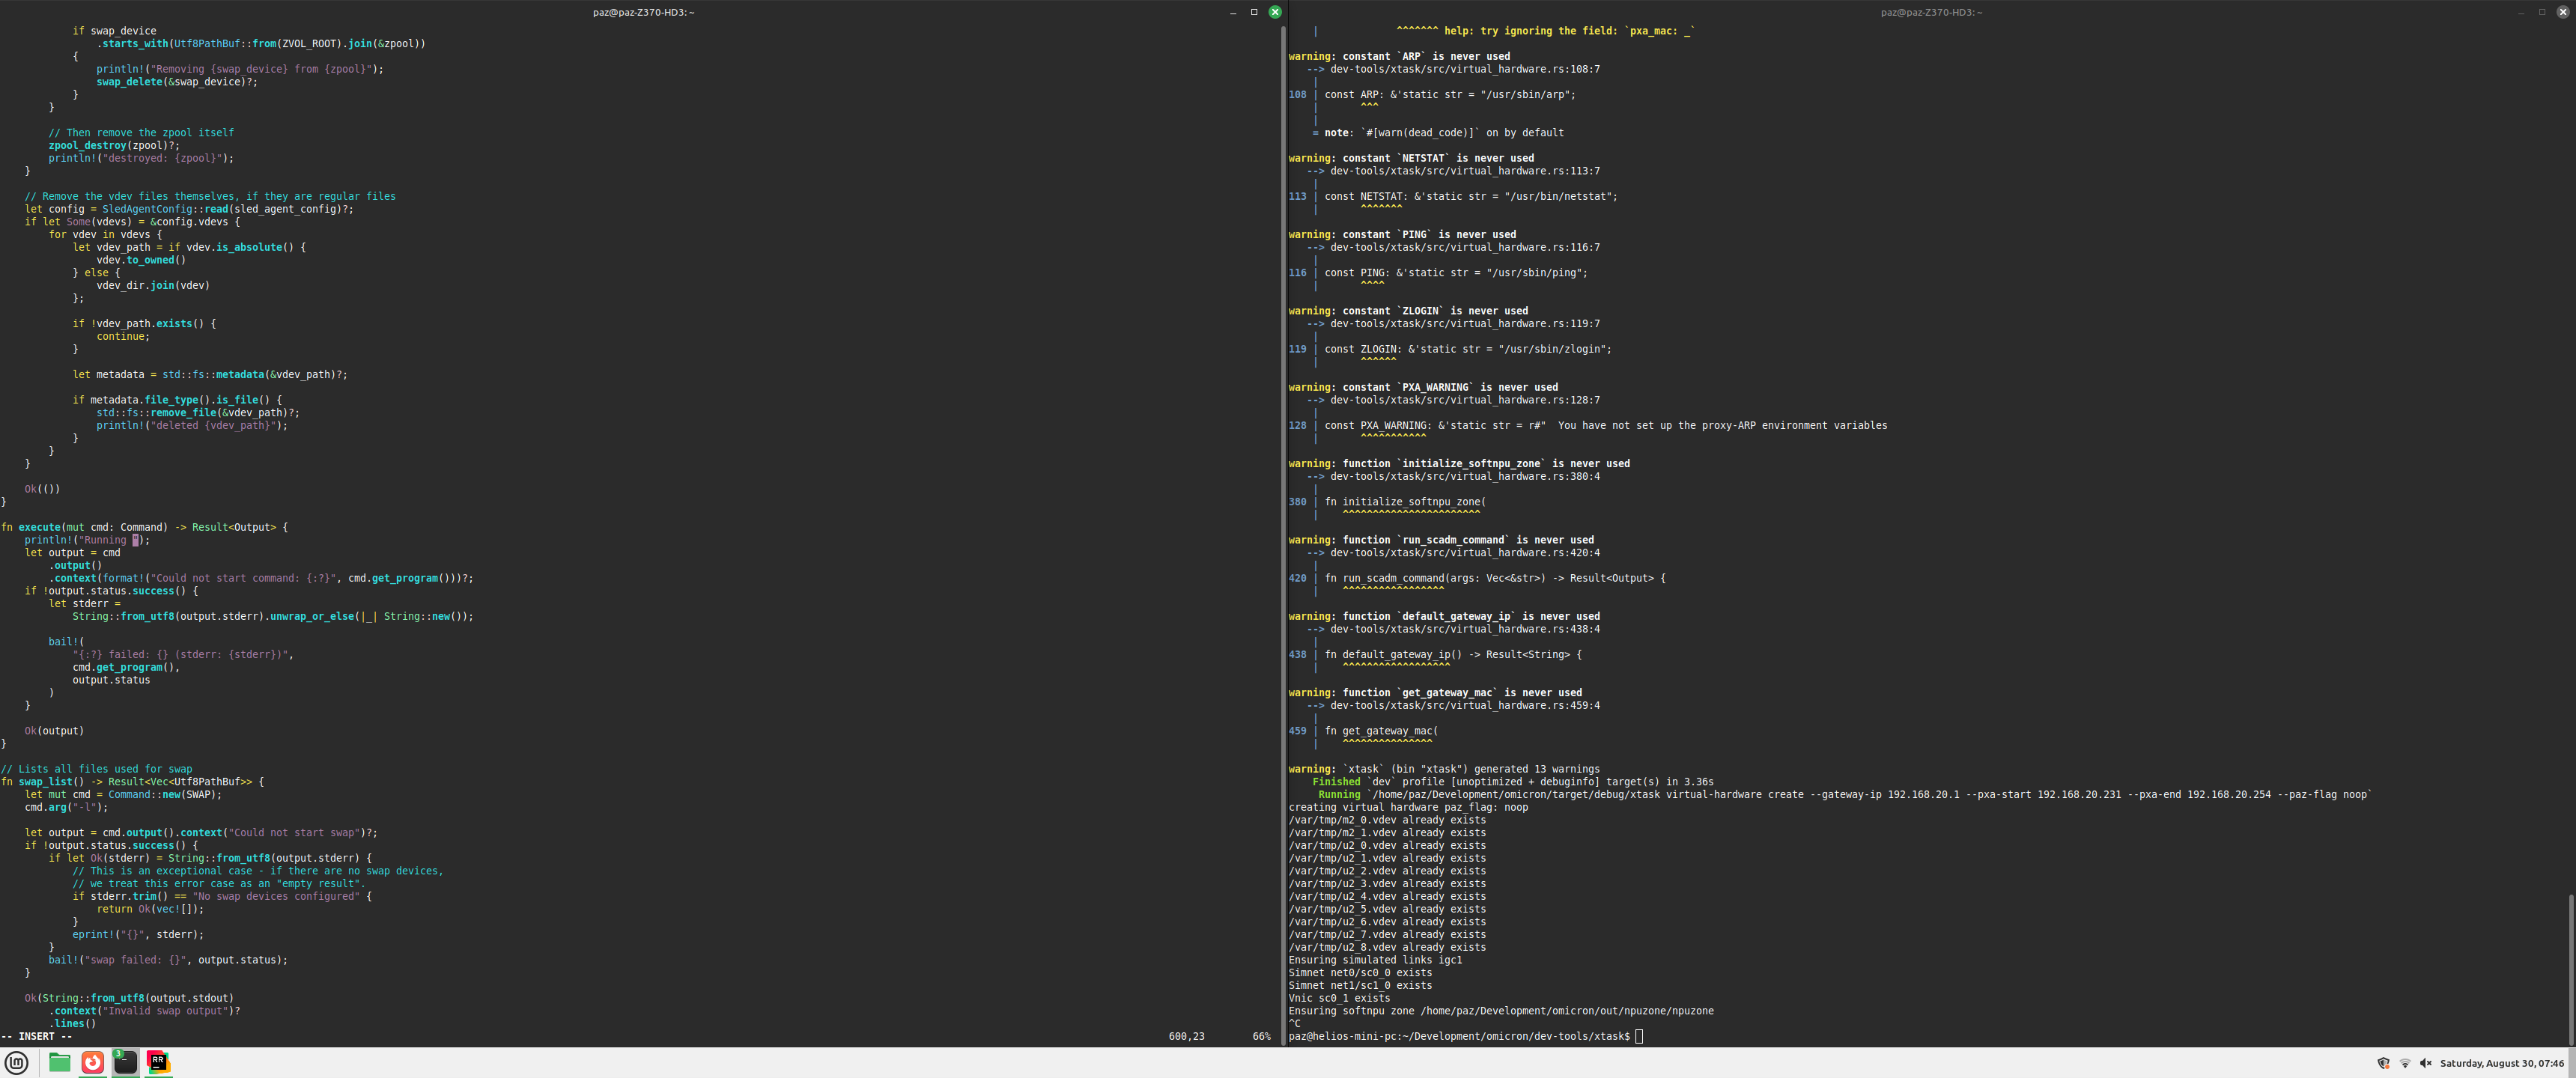
I uninstalled Omicron and reinstalled it. I accidently ran cargo run omicron-package without the --bin flag and when it finished building, I was presented with a full screen TUI which scared me a bit!


It seems to have run Wicket - the tool used to set up a rack.
After running the command correctly, I started to watch the logs.
I didn’t expect that!
The agent attempted to start but ended up panicking.
The end of the sled agent logs:
{"msg":"Starting management of disk","v":0,"name":"SledAgent","level":30,"time":"2025-09-05T22:18:24.700568872Z","hostname":"helios-mini-pc","pid":2975,"component":"ConfigReconcilerTask","file":"sled-agent/config-reconciler/src/reconciler_task/external_disks.rs:489","disk_identity":"DiskIdentity { vendor: \"synthetic-vendor\", model: \"synthetic-model-U2\", serial: \"synthetic-serial-2\" }"}
{"msg":"Invoking SyntheticDisk::new","v":0,"name":"SledAgent","level":30,"time":"2025-09-05T22:18:24.700584594Z","hostname":"helios-mini-pc","pid":2975,"component":"ConfigReconcilerTask","file":"sled-storage/src/disk.rs:65","path":"/var/tmp/u2_2.vdev","identity":"DiskIdentity { vendor: \"synthetic-vendor\", model: \"synthetic-model-U2\", serial: \"synthetic-serial-2\" }"}

thread 'tokio-runtime-worker' panicked at /home/paz/Development/omicron/sled-storage/src/disk.rs:79:10:
called `Result::unwrap()` on an `Err` value: UnexpectedUuid { expected: aa938e74-2a55-4ee5-b1a1-91c634363b56 (zpool), observed: dd3f0b38-9ca7-409d-8988-983b599806d9 (zpool) }
note: run with `RUST_BACKTRACE=1` environment variable to display a backtrace
Well that’s annoying. I decided to look through the code and see if there is any obvious cause. From tracing function calls all the way up the call stack, I determined that expected zpool id is coming from the ledger in pool/int/5e0405ec-58de-47db-85dc-cfac20d13dae/config/omicron-sled-config.json. It seems like the omicron keeps ledgers to store data about the system. There a few of these but the one we care about is omicron-sled-config.json.
Example snippet from omicron-sled-config.json:
{
    "generation": 2,
    "disks": {
        "5949d5a8-2903-48ea-a739-dc76b63dc3ac": {
            "identity": {
                "vendor": "synthetic-vendor",
                "model": "synthetic-model-U2",
                "serial": "synthetic-serial-5"
            },
            "id": "5949d5a8-2903-48ea-a739-dc76b63dc3ac",
            "pool_id": "8c5b1a63-9e9d-49bb-9ca5-b440f27b7f4b"
        },
        "17676e1a-1e5f-47b8-b3bd-9cecdbddce98": {
            "identity": {
                "vendor": "synthetic-vendor",
                "model": "synthetic-model-U2",
                "serial": "synthetic-serial-1"
            },
            "id": "17676e1a-1e5f-47b8-b3bd-9cecdbddce98",
            "pool_id": "aa938e74-2a55-4ee5-b1a1-91c634363b56"
        }
    },
    ...truncated...
}
I was able to set the environment variable RUST_BACKTRACE set to 1 using svcprop6.
# (this is an example from an older log)
{"msg":"Zpool UUID mismatch","v":0,"name":"SledAgent","level":40,"time":"2025-09-01T09:43:17.57207705Z","hostname":"helios-mini-pc","pid":3685,"component":"ConfigReconcilerTask","file":"sled-hardware/src/disk.rs:355","observed":"bf61136c-7de9-406a-b0e3-a1b7307ee4ac (zpool)","expected":"c8591757-94f2-4735-8dae-bba4dc81bd46 (zpool)"}
stack backtrace:
   0: __rustc::rust_begin_unwind
   1: core::panicking::panic_fmt
   2: core::result::unwrap_failed
   3: sled_storage::disk::Disk::new::{{closure}}
   4: sled_agent_config_reconciler::reconciler_task::external_disks::ExternalDisks::start_managing_disk::{{closure}}
   5: <futures_util::future::join_all::JoinAll<F> as core::future::future::Future>::poll
   6: sled_agent_config_reconciler::reconciler_task::ReconcilerTask::do_reconcilation::{{closure}}
   7: sled_agent_config_reconciler::reconciler_task::ReconcilerTask::run::{{closure}}
note: Some details are omitted, run with `RUST_BACKTRACE=full` for a verbose backtrace.
I looked around the code to see what causes the ledger to be written. After an hour or so, I realized this is not feasible because there are too many potential ways to update the config. Not only could there be other code that I didn’t find, it looks like there is a http endpoint that allows clients to update this file. This means any client could update cause the ledger to be updated, and going through all the code to figure that out is not reasonable.
I knew where the file was but I had more questions:
- Where is it getting the “observed” UUIDs?
- Was any other process updating the file?
- What determines the UUIDs that are written to that file?
Where are the observed UUIDs coming from?
This was straight forward to find out. There is only one spot where this error is returned and this function calls Fstype::get_zpool(). So it is running the following command and extracting some of its output.
LC_ALL=C.UTF-8
/usr/bin/pfexec /usr/sbin/fstyp -a /var/tmp
/var/tmp comes from MountConfig and is set here.
This is where the vdevs are mounted. That makes sense. To be honest, I don’t fully understand all the abstractions with zfs so this wasn’t obvious to me.
I ran fstyp manually and sure enough, the ids don’t match the ledger. The id is the name without the prefix ‘oxi_’.
zfs
version: 5000
name: 'oxi_5e0405ec-58de-47db-85dc-cfac20d13dae'
state: 0
txg: 4
pool_guid: 14600592719975481454
errata: 0
hostid: 864173
hostname: 'helios-mini-pc'
top_guid: 17257350278378199624
guid: 17257350278378199624
vdev_children: 1
vdev_tree:
    type: 'file'
    id: 0
    guid: 17257350278378199624
    path: '/var/tmp/m2_0.vdev'
    metaslab_array: 128
    metaslab_shift: 29
    ashift: 12
    asize: 21470117888
    is_log: 0
    create_txg: 4
features_for_read:
    com.delphix:hole_birth
    com.delphix:embedded_data
gen_clean: true
gen_guid: '17257350278378199624'
gen_version: '5000'
gen_volume_label: 'oxi_5e0405ec-58de-47db-85dc-cfac20d13dae'
...truncated...
Who is changing this file?
After finding out where the observed UUIDs are coming from, I figured the omicron-sled-agent.json config is probably what is wrong. After all, the observed value is coming from the file system itself. So to continue the investigation, I wanted to confirm that nothing else was updating the file.
I found the illumos equivalent of strace: truss. With the help of ChatGPT, I wrote a script that would find the PID of the sled agent (not the ctrun PID) and use truss to trace the sys calls. Here is a subset of the trace.
17472/8:        open("/pool/int/5e0405ec-58de-47db-85dc-cfac20d13dae/config/omicron-sled-config.json", O_RDONLY|O_CLOEXEC) = 24
17472/6:        write(9, " { " m s g " : " A t t e".., 439)     = 439
17472/6:        write(9, " { " m s g " : " R e a d".., 294)     = 294
17472/8:        close(24)                                       = 0
17716/1:        open("/usr/perl5/5.36/lib/unicore/lib/Bc", O_RDONLY|O_NDELAY|O_LARGEFILE) = 15
17472/6:        write(9, " { " m s g " : " s l e d".., 257)     = 257
17472/6:        write(9, " { " m s g " : " n e w  ".., 342)     = 342
17716/2:        write(20, " #   ! ! ! ! ! ! !      ".., 740)    = 740
17716/8:        close(27)                                       = 0
17716/2:        close(20)                                       = 0
17716/2:        close(14)                                       = 0
17716/8:        open("/usr/perl5/5.36/lib/DBM_Filter/int32.pm", O_RDONLY|O_CLOEXEC) = 20
17716/1:        close(15)                                       = 0
17716/2:        open("/usr/perl5/5.36/lib/unicore/lib/Ext/Y.pl", O_RDONLY|O_CLOEXEC) = 14
17716/5:        open("/usr/perl5/5.36/lib/unicore/lib/InPC/Right.pl", O_RDONLY|O_CLOEXEC) = 21
17472/8:        open("/pool/int/7fbb2597-0e44-4561-97ac-46c87c26e186/config/omicron-sled-config.json", O_RDONLY|O_CLOEXEC) = 24
17716/2:        open("/zone/oxz_switch/root/usr/perl5/5.36/lib/unicore/lib/Ext/Y.pl", O_WRONLY|O_CREAT|O_EXCL|O_CLOEXEC, 0100444) = 27
17472/6:        write(9, " { " m s g " : " R e a d".., 294)     = 294
17716/5:        open("/zone/oxz_switch/root/usr/perl5/5.36/lib/unicore/lib/InPC/Right.pl", O_WRONLY|O_CREAT|O_EXCL|O_CLOEXEC, 0100444) = 28
17472/8:        close(24)                                       = 0
17716/1:        open("/usr/perl5/5.36/lib/unicore/lib/CWCM", O_RDONLY|O_NDELAY|O_LARGEFILE) = 23
17716/7:        open("/zone/oxz_switch/root/usr/perl5/5.36/lib/i86pc-solaris-thread-multi-64/Encode/JP/JIS7.pm", O_WRONLY|O_CREAT|O_EXCL|O_CLOEXEC, 0100444) = 24
17716/2:        write(27, " #   ! ! ! ! ! ! !      ".., 863)    = 863
17716/5:        write(28, " #   ! ! ! ! ! ! !      ".., 2312)   = 2312
17716/2:        close(27)                                       = 0
17716/8:        open("/zone/oxz_switch/root/usr/perl5/5.36/lib/DBM_Filter/int32.pm", O_WRONLY|O_CREAT|O_EXCL|O_CLOEXEC, 0100444) = 15
17716/5:        close(28)                                       = 0
17716/2:        close(14)                                       = 0
17716/5:        close(21)                                       = 0
17716/8:        write(15, " p a c k a g e   D B M _".., 754)    = 754
17716/2:        open("/usr/perl5/5.36/lib/unicore/lib/Ccc/VR.pl", O_RDONLY|O_CLOEXEC) = 14
17472/6:        write(9, " { " m s g " : " L e d g".., 246)     = 246
17716/5:        open("/usr/perl5/5.36/lib/unicore/lib/InPC/TopAndL2.pl", O_RDONLY|O_CLOEXEC) = 21
17716/2:        open("/zone/oxz_switch/root/usr/perl5/5.36/lib/unicore/lib/Ccc/VR.pl", O_WRONLY|O_CREAT|O_EXCL|O_CLOEXEC, 0100444) = 27
17472/6:        write(9, " { " m s g " : " s t a r".., 271)     = 271
17716/5:        open("/zone/oxz_switch/root/usr/perl5/5.36/lib/unicore/lib/InPC/TopAndL2.pl", O_WRONLY|O_CREAT|O_EXCL|O_CLOEXEC, 0100444) = 15
17716/8:        close(15)                                       = 0
17716/1:        close(23)                                       = 0
17716/3:        write(26, " #   ! ! ! ! ! ! !      ".., 543)    = 543
17716/5:        write(15, " #   ! ! ! ! ! ! !      ".., 532)    = 532
17472/6:        write(9, " { " m s g " : " r e a d".., 281)     = 281
17716/7:        write(24, " p a c k a g e   E n c o".., 4262)   = 4262
17472/6:        write(9, " { " m s g " : " f a i l".., 304)     = 304
17716/7:        close(24)                                       = 0
17472/6:        write(9, " { " m s g " : " r e a d".., 281)     = 281
17716/5:        close(15)
It looks like the sled agent is only reading the file before erroring out. This must mean that it was written in an earlier run. I uninstalled and reinstalled Omicron to get a fresh example (this is quick and easy with the omicron-package tool).
Here is a truss trace after uninstalling and reinstalling omicron. It writes just once. Unfortunately, truss only prints out a fixed portion of the buffer which I couldn’t increase.
21860/15:       open("/pool/int/5e0405ec-58de-47db-85dc-cfac20d13dae/config/.omicron-sled-config.json.tmp", O_WRONLY|O_CREAT|O_TRUNC|O_CLOEXEC, 0666) = 30
21860/15:       write(30, " { " g e n e r a t i o n".., 20116)  = 20116
21860/15:       close(30)                                       = 0
21860/15:       rename("/pool/int/5e0405ec-58de-47db-85dc-cfac20d13dae/config/.omicron-sled-config.json.tmp", "/pool/int/5e0405ec-58de-47db-85dc-cfac20d13dae/config/omicron-sled-config.json") = 0
21860/6:        write(9, " { " m s g " : " W r i t".., 297)     = 297
21860/15:       open("/pool/int/7fbb2597-0e44-4561-97ac-46c87c26e186/config/.omicron-sled-config.json.tmp", O_WRONLY|O_CREAT|O_TRUNC|O_CLOEXEC, 0666) = 30
21860/15:       write(30, " { " g e n e r a t i o n".., 20116)  = 20116
21860/15:       close(30)                                       = 0
21860/15:       rename("/pool/int/7fbb2597-0e44-4561-97ac-46c87c26e186/config/.omicron-sled-config.json.tmp", "/pool/int/7fbb2597-0e44-4561-97ac-46c87c26e186/config/omicron-sled-config.json") = 0
21860/6:        write(9, " { " m s g " : " u p d a".., 261)     = 261
21860/2:        close(22)                                       = 0
21860/6:        write(9, " { " m s g " : " s t a r".., 271)     = 271
This is good evidence but just to be sure, I wanted to get the whole buffer of what is being written. I attempted to use dtrace but I didn’t get good results with ChatGPT’s help. Since I have the source code, I ended up adding an extra log line to print out the contents of the ledger when it is written. I uninstalled and reinstalled Omicron and started it up.
D’Oh! After looking at the logs again, I saw my extra log with the ledger’s contents but I also saw another message that prints out the contents of the ledger. It was there the whole time! This is good evidence that this is the only time it is being written. Now we need to find out what is setting the UUID in the ledger.
What is setting the UUID?
I am not confident in my findings here. From my reading of the code, the UUIDs are generated if the ledger is not present (which is the case on a fresh install). This means if there are zpools already on the system, they will never match. How could they ever match then? Well if there are no zpools, the sled agent will create them itself. From the comments in the code, creating a zpool is not expected so I don’t know if this is happening for sure. Let’s delete the zpools and have another go.
That’ll do
After removing the zpools, I uninstalled and reinstalled Omicron.
Woo! It got past the UnexpectedUuid error! But… it crashed again. This is where I decided to stop working on it for now and write this post.
Conclusion
I want to go deeper into each problem and make sure my understanding is correct but I only have limited time to work on this. This forced me to keep moving if I ever wanted to finish this project.
Overall, I am glad that I did this project. Even though I didn’t get Omicron running, I learned a lot and it forced me to get out of my comfort zone (especially when it comes to writing). I bumped into a bunch of problems, a few of which were from retrying commands where they expected to be run from a clean state. I didn’t manage to get things going, but at some point I will try again.
I have some options:
- Try deploying on a different machine, one with more RAM and a better SSD
- Go deep into debugging the crashes and learn a lot about illumos, drivers, the kernel, hardware, etc.
Another lesson I learned was to start the writing process earlier. I had taken some notes but it was difficult to piece together all the things I had done when writing this blog post. Since I did this over a few weekends, I had forgotten the details of what I did earlier in the project. I assumed that the ChatGPT chat history would be enough for me to piece everything back together but no, it was not. It doesn’t capture the exact actions I performed (sometimes it gave me the wrong answer but showed me a new tool or idea).
Thank you for reading.
Appendix
Follow up tasks
-
Update the documentation that references
--vdev-dirThe param to cargo xtask virtual-hardware create
--vdev-dirshould be passed in before the create subcommand like:cargo xtask virtual-hardware --vdev-dir '/scratch' create -
Try and get the PR for dladm simnet command documentation merged
-
Figure out why I cant set link-prop for persistent simnets
-
Figure out why npuzone needs to be run twice.
Future learning
- Dig into illumos and zfs (I still don’t really understand how zfs works)
- Deploy helios on my gaming pc (different SSD) and see how it goes.
- Actually figure out why is the system crashing
- Learn more about tracing: dtrace, truss, ctrun, ptree
Understand the following commands from omicron/docs/how-to-run.adoc
$ pfexec dladm create-etherstub -t fake_external_stub0
$ pfexec dladm create-vnic -t -l fake_external_stub0 fake_external0
$ pfexec ipadm create-if -t fake_external0
$ pfexec ipadm create-addr -t -T static --address 192.168.1.199 fake_external0/external
$ echo "map igb0 192.168.1.0/24 -> 0/32 portmap tcp/udp auto" > /tmp/ipnat.conf
$ echo "map igb0 192.168.1.0/24 -> 0/32" >> /tmp/ipnat.conf
$ pfexec cp /tmp/ipnat.conf /etc/ipf/ipnat.conf
$ pfexec routeadm -e ipv4-forwarding -u
$ svcadm enable ipfilter
-
And another really good one while they were starting the company On the Metal ↩︎
-
It also found a blog post from 2012 about a different project called Helios ↩︎
-
The product page for it seems to have be removed… Probably a bad sign ↩︎
-
I forgot to take a picture. ↩︎
-
This could be me, if I get the time and energy ↩︎
-
I forgot exactly how I did this. I should have taken better notes ↩︎